
Skin tags, those small, benign growths that often appear on the neck, armpits, and groin, can be a cosmetic concern for many. While medical professionals offer several removal methods, a growing number of individuals are seeking a natural way to remove skin tags at home. These growths, medically known as acrochordons, are typically harmless but can become irritated by friction or snagged by clothing and jewelry. Exploring natural methods can offer a less invasive and more cost-effective alternative for those looking to manage these skin imperfections.
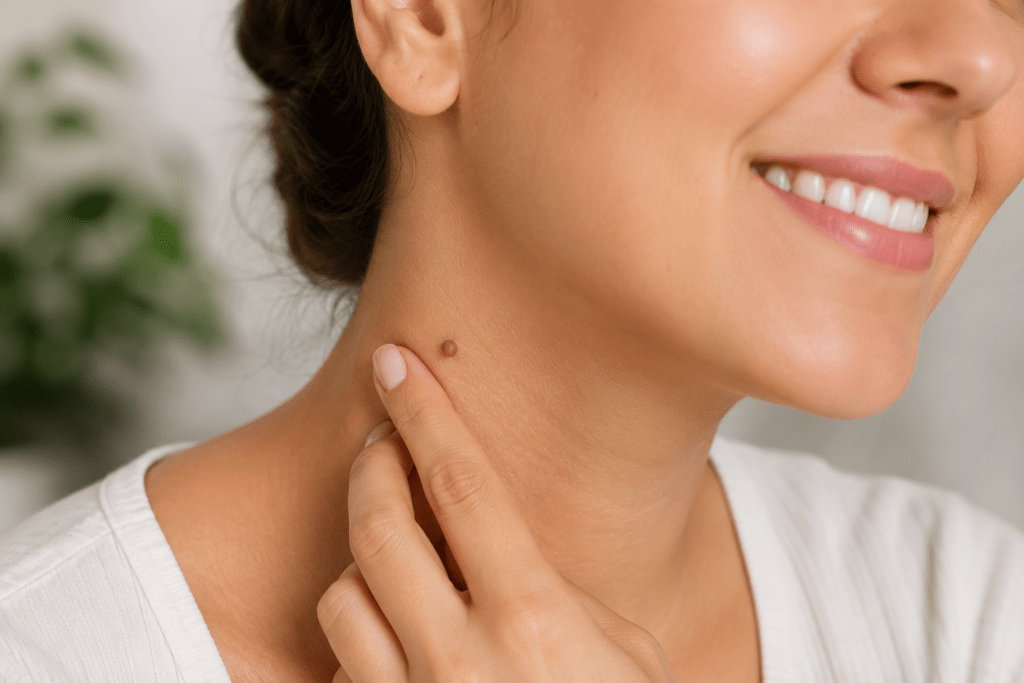
This guide explores proven and commonly discussed natural approaches to skin tag removal, providing insights into their mechanisms, potential effectiveness, and important safety considerations. We will examine the scientific basis behind these methods, discuss how to implement them safely, and highlight when it is essential to consult a healthcare professional.
Understanding Skin Tags and Natural Removal Principles
To address skin tags effectively, it helps to know what they are. These growths are soft, flesh-colored, and typically harmless. They often show up in areas where skin rubs against skin or clothing, such as the neck, armpits, groin, eyelids, and under the breasts. Common factors that contribute to their formation include friction, genetics, obesity, insulin resistance, and hormonal changes, such as those during pregnancy.
It is vital to distinguish skin tags from other types of skin growth. Moles, warts, and certain keratoses can look similar but require different care. If you are unsure about growth, always get a professional diagnosis from a dermatologist first.
The principles behind natural removal focus on ingredients that may help dry out, break down, or inhibit the growth of the tag. Many approaches rely on mild exfoliation or antimicrobial properties to irritate the tag, causing it to shrink and eventually fall off. Patience and consistency are key when trying natural methods, as results rarely happen overnight. Importantly, remember that “natural” does not always mean “safe” to everyone. Ingredients that work for one person might cause severe irritation for another, making patch testing a crucial first step.
Tried-and-Tested Natural Remedies for Skin Tag Removal
Many people turn to household staples to address skin tags. While some report on success, these methods require care to avoid damaging the healthy skin around the growth.
Step-by-Step Procedures for Natural Skin Tag Remedies
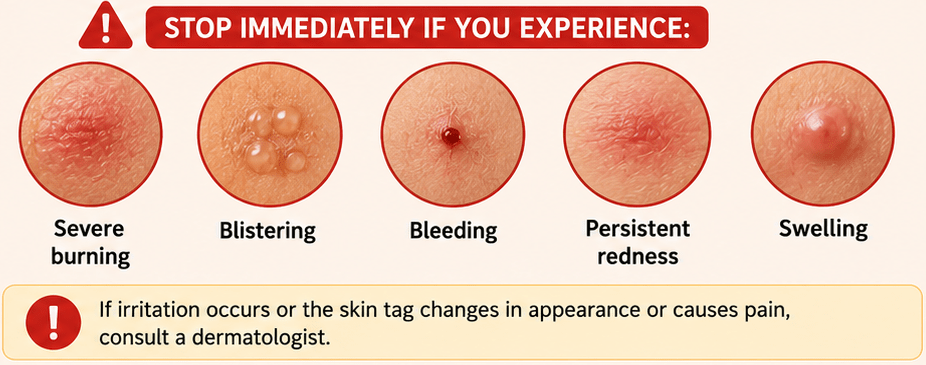
Important: These remedies have limited scientific evidence for removing skin tags and may cause skin irritation or burns. Always perform a patch test on a small area of skin 24–48 hours before use. If the skin tag changes in color, bleeds, becomes painful, or shows signs of infection, stop treatment and consult a dermatologist.
1. Apple Cider Vinegar (ACV) Method
Apple cider vinegar (ACV) is a popular home remedy for skin tags because it contains acetic acid, which some believe may gradually dry out and break down the tissue of the skin tag, causing it to shrink and eventually fall off. However, there is limited scientific evidence supporting its effectiveness, and most claims are based on personal experiences rather than clinical studies. Because ACV is acidic, it can also irritate or burn healthy skin, so it should be used with caution, especially on sensitive skin. Always perform a patch test first, discontinue use if irritation occurs, and consult a dermatologist if the skin tag changes in appearance or causes pain.
What You’ll Need
- 1 teaspoon apple cider vinegar
- Cotton ball or cotton pad
- Medical tape or adhesive bandage
- Mild soap and water

Step-by-Step Instructions
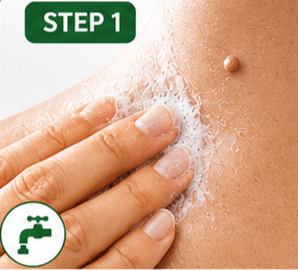
Step 1: Wash the affected area with mild soap and warm water, then pat it completely dry.

Step 2: Soak a small cotton ball in apple cider vinegar. If you have sensitive skin, dilute the vinegar with an equal amount of water.
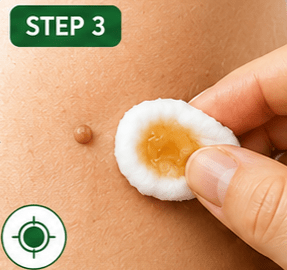
Step 3: Place the soaked cotton directly on the skin tag.
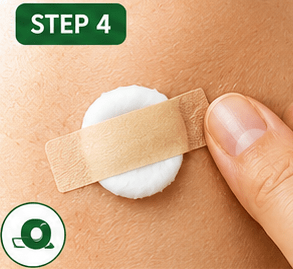
Step 4: Secure it with medical tape or a bandage to keep it in place.
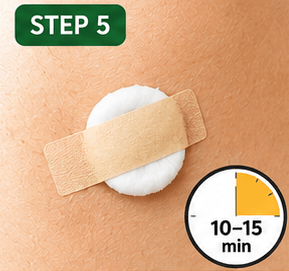
Step 5: Leave it on for 10–15 minutes during your first few applications. If your skin tolerates it well, you may gradually increase the time but avoid prolonged exposure.
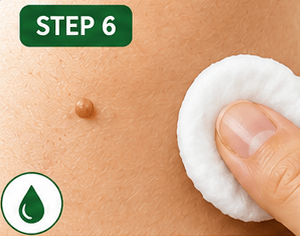
Step 6: Remove the cotton and rinse the area with clean water.
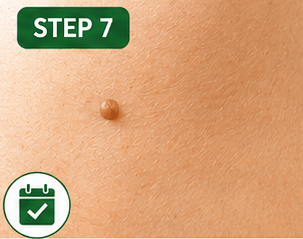
Step 7: Repeat once daily until the skin tag shrinks or falls off. This may take several days to a few weeks.
2. Tea Tree Oil Method
Tea tree oil is well known for its antimicrobial, antiseptic, and anti-inflammatory properties, making it a popular natural remedy for various skin concerns. Some people believe it may help dry out skin tags over time by gradually affecting the tissue, although there is limited scientific evidence proving its effectiveness for skin tag removal. Because tea tree oil is highly concentrated, it should always be diluted with a carrier oil, such as coconut or jojoba oil, before applying it to the skin. Performing a patch test is also recommended, as some individuals may experience skin irritation or allergic reactions.
What You’ll Need
- 2–3 drops tea tree essential oil
- 1 teaspoon carrier oil (such as coconut oil or jojoba oil)
- Cotton swab
- Small bandage (optional)

Step-by-Step Instructions
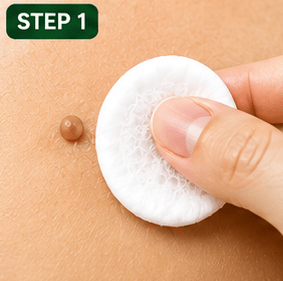
Step 1: Clean the skin tag and surrounding skin with mild soap and water.
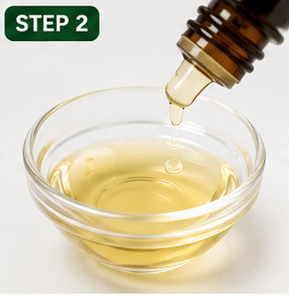
Step 2: Mix 2–3 drops of tea tree oil with 1 teaspoon of carrier oil.
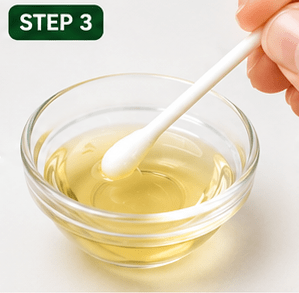
Step 3: Dip a cotton swab into the diluted mixture.
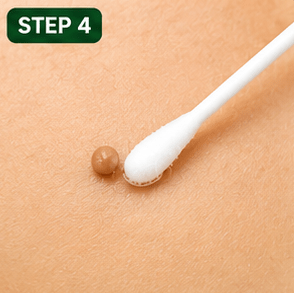
Step 4: Gently apply the oil directly onto the skin tag.
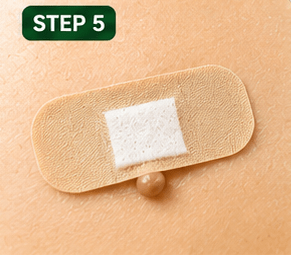
Step 5: Allow it to absorb naturally. You may cover the area with a small bandage if desired.

Step 6: Repeat the application twice daily.

Step 7: Continue for several weeks while monitoring your skin for irritation.
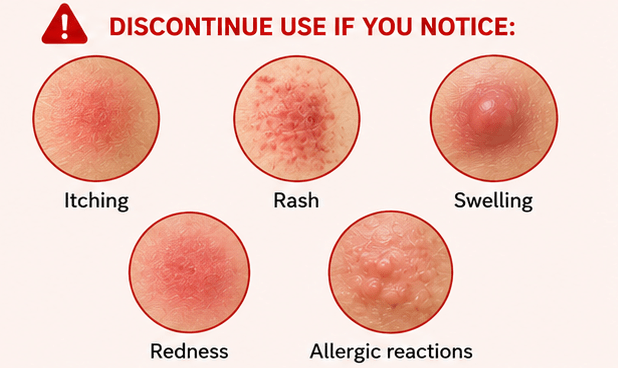
3. Garlic Extract Method
Garlic extract is another natural remedy that some people use for skin tags because it contains allicin, a sulfur-containing compound known for its antimicrobial and antioxidant properties. Some believe that allicin may help dry out or gradually break down the tissue of a skin tag, causing it to shrink over time, although there is little scientific evidence to support its effectiveness for this purpose. Fresh garlic can be very potent and may cause skin irritation, redness, or even chemical burns if left on the skin for too long, so it should be used cautiously and only after performing a patch test.
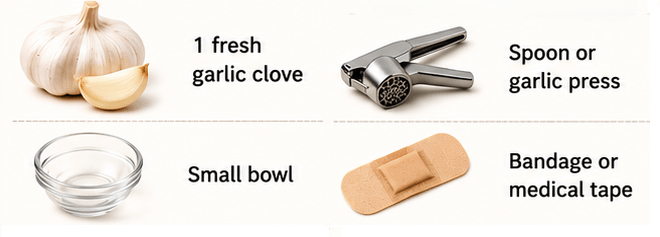
What You’ll Need
- 1 fresh garlic clove
- Small bowl
- Spoon or garlic press
- Bandage or medical tape
Step-by-Step Instructions
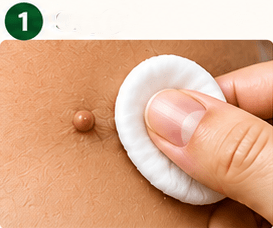
Step 1: Wash and dry the affected area thoroughly.

Step 2: Peel one fresh garlic clove.
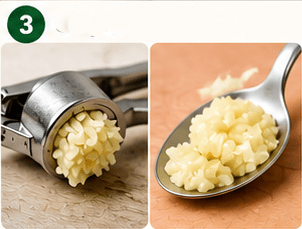
Step 3: Crush the garlic into a paste using a garlic press or the back of a spoon.
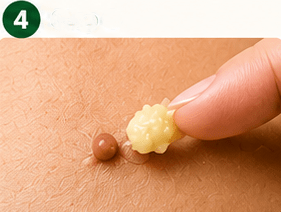
Step 4: Apply a small amount of the paste directly to the skin tag, avoiding the surrounding healthy skin as much as possible.
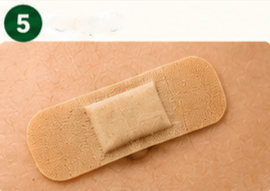
Step 5: Cover the area with a clean bandage.

Step 6: Leave the garlic for 15–30 minutes. Garlic is potent and can cause skin burns if left on too long.
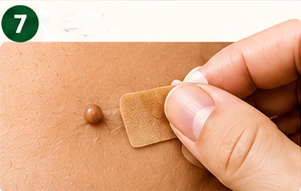
Step 7: Remove the bandage and wash the area thoroughly with mild soap and water.

Step 8: Repeat once daily only if your skin shows no signs of irritation.

Safety Tips Before Trying Any Remedy
- ✔️ Perform a patch test 24–48 hours before first use.
- ✔️ Only treat skin tags that have been identified by a healthcare professional.
- ✔️ Avoid removing skin tags located on the eyelids, face, genitals, or near the anus without medical advice.
- ✔️ Never cut, twist, or pull off a skin tag at home.
- ✔️ Keep the area clean to reduce the risk of infection.
- ✔️ If the skin tag changes in size, shape, color, or bleeds unexpectedly, seek evaluation from a dermatologist.
Note: Although these home remedies are popular, there is limited clinical evidence supporting their effectiveness. Dermatologist-performed treatments such as cryotherapy, electrocautery, or surgical removal remain the safest and most reliable methods for removing skin tags.
Gentle and Supportive Natural Approaches
Other methods focus on milder ingredients, though they still carry risks if used incorrectly. Lemon juice is sometimes used because of its citric acid content, which may help dry out the tag. You can apply fresh lemon juice with a cotton swab, let it air dry, and repeat regularly. Keep in mind that lemon juice can increase your skin’s sensitivity to the sun, and it may cause stinging on broken or irritated skin.
Iodine is another option, sometimes used to disrupt cellular function in the tag. You can apply a small amount of tincture of iodine directly to the growth and cover it. However, iodine can stain the skin and clothing. Furthermore, there are potential concerns regarding thyroid function with prolonged or extensive use, so it is best to consult a doctor before using iodine regularly.
Beyond topical treatments, balancing your body can support skin health and potentially reduce the formation of new tags. Diet plays a role, as high sugar intake and insulin resistance are often linked to tag development. Staying well-hydrated helps maintain overall skin health. Additionally, managing factors like weight and stress can contribute to better skin outcomes over time.
Essential Safety Precautions and When to Seek Professional Help
Safety must be your top priority when attempting to remove skin tags at home. Always perform a patch test first. Apply a small amount of your chosen remedy to an inconspicuous area of skin—like your inner forearm—and wait 24 to 48 hours to ensure you do not have a negative reaction. This simple step can prevent painful skin damage.
Pay close attention to the area you are treating. If you notice excessive redness, swelling, pain, pus, or if the tag starts to darken significantly, stop the treatment immediately. These can be signs of infection or severe irritation.
There are times when natural methods are simply not the right choice. If a skin tag is growing rapidly, bleeding, causing pain, or changing color or texture, it requires a professional evaluation. Furthermore, those with conditions like diabetes, a compromised immune system, or those who are pregnant should be extra cautious, as improper removal can lead to complications. In these cases, professional removal options—such as cryotherapy, surgical excision, or electrocautery—are safer and more effective.
Final Thoughts on Natural Skin Tag Removal
Addressing skin tags naturally is a process that requires patience, consistency, and a careful approach. While remedies like apple cider vinegar, tea tree oil, and others are commonly discussed, they work differently for everyone. You must prioritize your safety by performing patch tests and monitoring your skin for any signs of irritation or infection.
Remember that natural methods are not guaranteed to work for every individual or every skin tag. If a growth is persistent, concerning, or simply not responding to home treatment, do not hesitate to reach out to a dermatologist. A professional can provide an accurate diagnosis and ensure that you receive the safest, most effective care for your skin.
Recommended Products
Disclosure: As an Amazon Associate, I earn from qualifying purchases. We only recommend products that we believe offer value to our readers. Learn more.




Frequently Asked Questions (FAQ)
References
- American Academy of Dermatology Association. (n.d.). Skin conditions A to Z. https://www.aad.org/public/diseases
- Bolognia, J. L., Schaffer, J. V., & Cerroni, L. (2018). Dermatology (4th ed.). Elsevier.
- Cleveland Clinic. (2024). Skin tags (acrochordons): Causes, symptoms & treatment. https://my.clevelandclinic.org/health/diseases/21528-skin-tags
- DermNet New Zealand. (2023). Skin tag (acrochordon). https://dermnetnz.org/topics/skin-tag
- Habif, T. P. (2021). Clinical dermatology: A color guide to diagnosis and therapy (7th ed.). Elsevier.
- Mayo Clinic. (n.d.). Skin care and skin conditions. https://www.mayoclinic.org
- National Institute of Diabetes and Digestive and Kidney Diseases. (2024). Insulin resistance & prediabetes. https://www.niddk.nih.gov/health-information/diabetes/overview/what-is-diabetes/prediabetes-insulin-resistance
- National Library of Medicine. (2023). Acrochordon. MedlinePlus Medical Encyclopedia. https://medlineplus.gov/ency/article/000848.htm
- National Library of Medicine. (2023). Skin tags: Acrochordons. MedlinePlus. https://medlineplus.gov
- Rasi, A., Soltani-Arabshahi, R., Shahbazi, N., & Noorbala, M. T. (2007). Skin tag as a cutaneous marker for impaired carbohydrate metabolism: A case-control study. International Journal of Dermatology, 46(11), 1155–1159. https://doi.org/10.1111/j.1365-4632.2007.03368.x
- Sari, R., Akman, A., Alpsoy, E., & Balci, M. K. (2010). The metabolic profile in patients with skin tags. Clinical and Experimental Medicine, 10(3), 193–197. https://doi.org/10.1007/s10238-009-0080-6